

How to Wash Portable Juice Blender? Easy Cleaning Guide
Learn the best way to wash your portable juice blender. Quick hacks, deep cleaning tips, and care tricks to keep it fresh, odor-free, and long-lasting.
Introduction
Portable blenders have become one of the most useful gadgets in modern kitchens. Whether you’re whipping up a quick mango smoothie, making lassi at the gym, or blending baby food on the go, these compact juicers save time and effort. But here’s the catch: because they’re small and often used for milk, fruits, and protein shakes, they get dirty quickly. If you don’t wash them properly, odors, stains, and even bacteria can build up. In this guide, we’ll walk through exactly how to wash a portable juice blender step by step, from quick daily cleans to deep cleaning tricks.
Why Cleaning Your Portable Blender Matters
Cleaning your portable juicer isn’t just about looks — it directly affects hygiene, taste, and the life of your blender.
Health & Hygiene
Leftover fruit pulp, milk proteins, or even a few drops of smoothie can quickly turn sour. In warm climates like Pakistan, bacteria grow even faster. Without regular cleaning, your next drink may carry unpleasant smells or worse — harmful germs. A clean blender keeps your juices safe, fresh, and healthy.
Performance & Battery Life
Dried pulp around the blades or seals can strain the motor. Sticky buildup on the gasket may cause leaks, while leftover residue makes the blades spin less efficiently. Over time, this not only affects performance but can also drain your battery faster. A clean blender runs smoother and lasts longer.

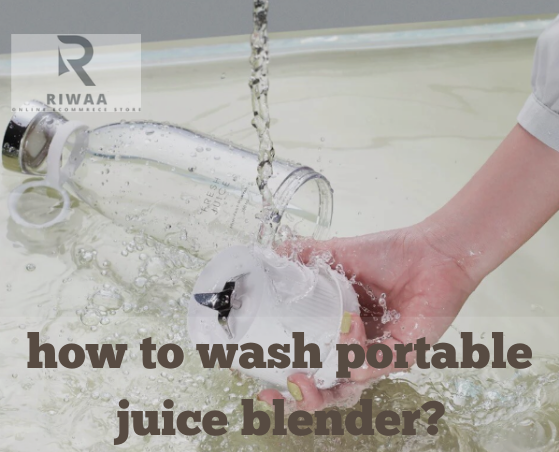
How to Wash Portable Juice Blender?
Now, let’s dive into the practical steps. There are three levels of cleaning you’ll need: a quick daily rinse, a step-by-step full clean, and an occasional deep clean.
Quick Everyday Clean — 60 Seconds Method
Portable blenders are made for convenience, and that includes cleaning. If you don’t want to spend much time washing after every use, the 60-second method works perfectly.
Here’s how you do it:
-
Fill the blender jar halfway with warm water.
-
Add just a couple of drops of mild dishwashing liquid.
-
Close the lid tightly.
-
Turn on the blender and let it run for 30–40 seconds. The soapy water will spin around the jar and blades, loosening any fruit or pulp stuck inside.
-
Empty the soapy water and rinse thoroughly with clean water until there’s no foam.
-
Place the jar upside down on a rack or towel to air-dry.
This quick cleaning habit prevents buildup, keeps odors away, and extends the life of your portable juicer.
Step-by-Step Full Clean (Disassemble → Deep Clean → Dry)
Sometimes your portable juicer needs more than just a rinse. Sticky smoothies, fibrous fruits, or milk-based drinks can leave residue that requires a deeper wash. Follow this process for a full clean.
Step 1: Power Down & Disassemble
Before anything else, make sure the blender is switched off and not connected to the charger. Remove the detachable parts—lid, blades (if your model allows), and gasket. Keeping the electrical base away from water is critical for safety.
Step 2: Pre-Rinse and Remove Pulp
Rinse the jar under warm running water. Use a spatula or spoon to remove pulp or seeds stuck at the bottom. This step prevents clogging and makes washing easier.
Step 3: Auto-Clean with Soap & Water
Pour in warm water with a drop of dish soap, reassemble the jar, and blend for 30 seconds. The spinning blades create foam that loosens any sticky residue in the jar corners.
Step 4: Scrub Blades & Seals Safely
Take apart the blade section if detachable. Use a soft brush or old toothbrush to scrub gently around blades, rubber seals, and crevices. These areas often trap juice and pulp, which can grow bacteria if not cleaned. Always handle blades carefully—never scrub with bare hands.
Step 5: Rinse and Dry Completely
Rinse all parts under clean running water until there is no soap left. Pat dry with a soft towel and leave everything on a rack to air dry fully before reassembling. Moisture trapped in seals or blades can cause mold growth.

Deep-Clean for Stains, Odors, and Stubborn Residue
Over time, blenders may develop odors or discoloration, especially after blending strong-smelling or staining ingredients like garlic, turmeric, or milk. Here’s how to fix them:
Vinegar Soak Method
Fill the jar with equal parts warm water and white vinegar. Let it sit for 30–60 minutes before rinsing. Vinegar kills bacteria and removes odors naturally.
Baking Soda Paste for Stains
Mix baking soda with a little water to form a paste. Apply it to stained areas inside the jar, scrub with a soft brush, and rinse. Baking soda works as a gentle abrasive to lift stains.
Lemon + Salt Freshening Trick
Cut a lemon in half, dip it in salt, and rub it around the inside of the jar. Blend with a little water if needed. Lemon acts as a natural deodorizer and leaves your blender smelling fresh.
Quick Fixes for Common Problems
Removing Lingering Odours
If your blender smells like last week’s smoothie, run a cycle with warm water, vinegar, and a slice of lemon. This refreshes the jar instantly.
Dealing with Milk or Lassi Residue
Dairy leaves a sticky film that attracts bacteria quickly. Always rinse immediately after use. If dried, soak the jar in warm water with dish soap for 15 minutes before scrubbing.
Removing Cloudiness & Limescale
In hard-water areas, limescale can cause cloudiness. Mix equal parts vinegar and water, fill the jar, and let it sit overnight. Rinse well in the morning to restore clarity.
What NOT to Do (Protect the Motor & Warranty)
To keep your blender working safely and longer, avoid these mistakes:
-
Do not submerge the motor or charging base in water.
-
Avoid using bleach or strong chemicals.
-
Never scrub with steel wool or hard sponges.
-
Do not blend hot liquids, as heat can damage seals.
-
Avoid running the blender empty—it strains the motor.

Parts Care: Blades, Gasket, Lid & USB Port
Proper care of each part ensures hygiene and extends the blender’s lifespan.
Cleaning the Blade Assembly
-
Rinse blades immediately after use to prevent pulp from drying.
-
Use a soft toothbrush to clean between blades.
-
Avoid soaking blades for long periods to keep them sharp.
Gasket & Seals: Stop Mold Before It Starts
-
Remove the rubber gasket when possible.
-
Wash with warm, soapy water and dry completely before reattaching.
-
Check regularly for mold buildup—replace if it becomes cracked or damaged.
Caring for the Motor/Base and Charging Port
-
Wipe the motor base with a damp microfiber cloth.
-
Keep the USB charging port dry at all times.
-
Use a cotton swab to clean dust or juice spills around the port.
Tools & Supplies You Should Keep Handy
Keeping a few simple tools makes cleaning much easier.
Recommended Brushes and Cleaners
-
Bottle brush for the jar.
-
Soft toothbrush for blades and seals.
-
Microfiber cloth for drying.
-
Mild dishwashing liquid.
Natural Cleaners vs. Store-Bought
-
Natural cleaners like vinegar, lemon, and baking soda are safe, cheap, and eco-friendly.
-
Store-bought cleaners may save time but always check that they are food-safe and gentle on plastic.

Fast Daily Routine vs Weekly Deep Clean
-
Daily Routine: Quick rinse, fill with warm soapy water, blend for 30 seconds, rinse, and air-dry.
-
Weekly Deep Clean: Disassemble, scrub blades and gaskets, soak jar in vinegar solution, and dry completely before reassembly.
Quick Recipes & When to Clean After Them
Some recipes require faster cleaning to avoid stains or odors:
-
Milkshakes / Lassi: Rinse immediately to prevent sour smell.
-
Protein Shakes: Wash quickly as powder sticks to jar walls.
-
Green Juices: Scrub after blending fibrous greens like spinach.
-
Fruit Smoothies: Clean promptly to avoid sticky sugar residue.
Conclusion
Cleaning a portable juice blender doesn’t have to be difficult. With a quick daily rinse and a proper weekly deep clean, your blender will stay fresh, odor-free, and safe to use. Remember, good cleaning habits not only protect your health but also keep your blender running smoothly for years.
FAQ’s
Can I put my portable blender in the dishwasher?
Not all portable blenders are dishwasher-safe. Some cups can go in the top rack, but the motor base should never be submerged. Always check your model’s manual to avoid damaging seals, blades, or voiding the warranty.
How often should I deep clean my blender?
A weekly deep clean is recommended, especially if you use milk, lassi, or protein shakes. Frequent use may require more cleaning. Regular deep cleaning prevents odors, bacteria, and buildup, ensuring smooth performance and extending your blender’s overall lifespan.
What’s the best way to remove bad smell?
To eliminate odors, fill the jar with warm water and add vinegar or lemon juice. Blend for 30 seconds, rinse thoroughly, and dry. This natural method neutralizes strong smells, keeping your blender fresh, hygienic, and safe for daily use.
Can I wash the USB port with water?
No, never wash the USB port with water. It risks short-circuiting and permanent damage. Instead, use a dry cotton swab to remove dirt or spills. Keep the port covered and always dry before charging to protect your blender’s electronics.
Why does my blender jar look cloudy?
Cloudiness often comes from hard water limescale or fruit residue. To restore clarity, soak the jar in a 50/50 mix of vinegar and water for an hour, rinse well, and dry. Regular deep cleaning prevents buildup and keeps jars clear.
Tags:
Previous
How to Use Portable Mini Juicer? Simple Guide & Tips
Next
Portable Mini Juicer vs Traditional Juicer: Best Choice?


