

How to Use Portable Mini Juicer? Simple Guide & Tips
Learn how to use a portable mini juicer with easy steps. Make fresh juices anytime, anywhere. Perfect for home, office, and travel!
Introduction
Portable mini juicers are changing the way we enjoy fresh juices and smoothies. Unlike bulky kitchen blenders, these handy devices are compact, rechargeable, and designed for people who are always on the move. Whether you want a quick smoothie before work, a refreshing drink after the gym, or a healthy juice while traveling, a portable juicer makes it possible.
This guide will walk you through everything you need to know—from unboxing and first use to cleaning, safety, troubleshooting, and even recipe ideas. By the end, you’ll know exactly how to use your mini juicer like a pro and make the most of every blend.
What Exactly Is a Portable Mini Juicer
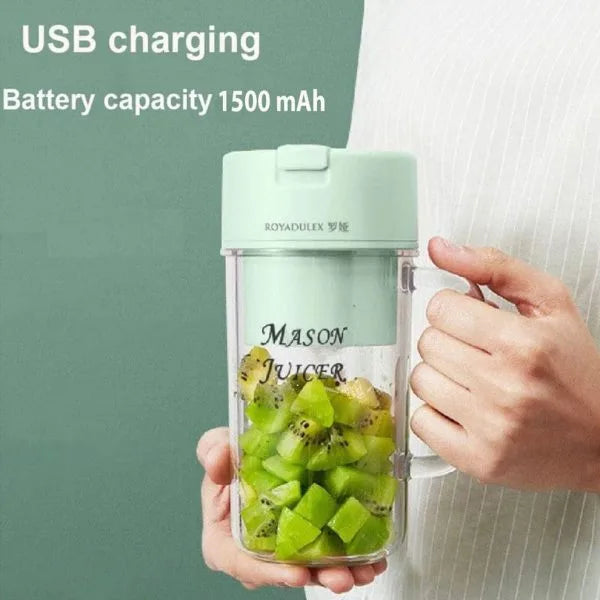
A portable mini juicer is essentially a battery-powered, travel-friendly blender. It’s small enough to fit in a backpack or handbag, yet powerful enough to whip up fresh fruit juices, smoothies, protein shakes, and even baby food. Unlike traditional blenders, which are bulky and require electricity, mini juicers are USB rechargeable and designed for portability.
Here’s what makes them unique:
-
Compact Cup Design (300–400 ml): Perfect for single servings.
-
Rechargeable Battery (1200–2000 mAh): Gives 8–12 blends per charge.
-
Stainless Steel Blades (4–6): Designed for soft fruits, leafy greens, and small ice chips.
-
Safety Locking Lid: Prevents spills and ensures the motor only runs when sealed.
-
Lightweight Build: Usually under 400 grams, ideal for travel.
With these features, a portable mini juicer becomes more than a kitchen gadget—it’s a health companion that fits modern, fast-paced lifestyles.

Unboxing & First-Use Checklist
Before you make your first smoothie, there are some important steps to follow. Skipping these can shorten your juicer’s life or give poor results.
Inspect, Rinse, and Charge
-
Inspect – Check the cup, lid, blades, and base for any damage from shipping. Make sure the silicone gasket (rubber ring) is properly fitted.
-
Rinse – Wash the cup, lid, and blade assembly with warm soapy water. Rinse well. Never submerge the motor base in water—just wipe it clean with a damp cloth.
-
Charge – Plug the juicer into a USB charger or power bank. A full charge (usually 3–4 hours) ensures maximum power for your first blends.
Reading the Max Line & Safety Notes
Every mini juicer has a max fill line etched into the cup. This isn’t decorative—it’s essential. Overfilling causes leaks and prevents proper blending. Always keep space at the top for airflow
Also, test the safety lock. The juicer won’t start unless the lid is properly aligned. Familiarize yourself with the locking motion before adding ingredients.
Step-by-Step: How to Use a Portable Mini Juicer
Step 1 — Charge Fully
Always begin with a full charge. A weak battery means slow blade movement and uneven blends. A good habit is to charge overnight before first use, then recharge after every 8–12 blends.
Step 2 — Prep Ingredients (Cut Size Matters)
Chop fruits and veggies into small 1–2 cm chunks. Remember, this isn’t a big kitchen blender—it needs manageable pieces.
What Works Best (and What Doesn’t)
-
Best Choices: Bananas, berries, mango, cucumber, spinach, yogurt, milk, oats, crushed ice.
-
Okay Choices: Carrots, apples, beets—but only if pre-chopped very small or lightly steamed.
-
Avoid: Large ice cubes, hot liquids, hard pits (like peach seeds), and super-thick nut butters.
Step 3 — Loading Order for Smooth Blends
Order matters. Always load:
-
Liquids first (water, milk, juice, coconut water).
-
Soft ingredients next (bananas, berries, yogurt).
-
Harder ingredients last (apples, carrots).
-
Ice chips on top.
This way, the blades catch liquid immediately and pull everything into a smooth vortex.
Step 4 — Lock the Lid & Start Blending
Twist the lid until you hear or feel a click. Then press the power button. Most models blend in 20–40 second cycles. Some stop automatically, while others need a second press to turn off.
Step 5 — Pulse, Shake, Finish, and Drink
If ingredients get stuck on the sides, pause, shake gently, then pulse again. Within 1–2 cycles, you’ll have a silky drink ready to sip straight from the cup.

How to Clean a Portable Mini Juicer (Quick & Deep)
30-Second Quick Clean
-
Fill the cup halfway with warm water.
-
Add a drop of dish soap.
-
Blend for 10–15 seconds.
-
Rinse thoroughly and let air-dry.
This prevents odor and buildup.
Deep Clean & Deodorize
For sticky protein shakes or strong-smelling recipes:
-
Fill with water + 1 tsp baking soda or a splash of vinegar.
-
Let soak for 10–15 minutes.
-
Blend briefly, rinse, and repeat with plain water.
What to Avoid While Cleaning
-
Never submerge the motor base in water.
-
Avoid boiling water—it can warp plastic seals.
-
Don’t scrub blades with bare hands; use a soft brush.
Safety, Hygiene & Smart Usage Tips
Battery & Charging Care
-
Always charge with a proper USB charger or power bank.
-
Avoid using the juicer while charging.
-
Do not overcharge—unplug when full to extend battery life.
Food Safety & Cross-Contamination
-
Rinse immediately after blending dairy or protein-based drinks.
-
Keep separate cups if preparing allergen-heavy recipes (like peanuts).
-
Never blend hot liquids—pressure buildup may pop the lid.
Troubleshooting: Common Issues & Fixes
Juicer Won’t Start
-
Ensure the lid is locked.
-
Recharge the battery.
-
Remove excess ingredients.
-
Let the motor cool if overheated.
Blends Are Lumpy
-
Cut ingredients smaller.
-
Add more liquid.
-
Shake and pulse instead of one long blend.
Leaks or Strange Noises
-
Check gasket placement.
-
Inspect for cracks in the cup.
-
Stop blending if a hard object (like a pit) is inside.

Pro Tips for Better Results
Texture, Taste, and Nutrition Upgrades
-
Add banana, yogurt, or avocado for creaminess.
-
Use chia seeds, oats, or flaxseeds for fiber.
-
Add lemon juice for a refreshing boost.
-
Use pre-thawed frozen fruit for a chilled, thick smoothie without straining the motor.
Quick & Healthy Recipes for Mini Juicers
5-Minute Breakfast Smoothies
-
Mango Banana Smoothie: Mango cubes, banana, milk, and honey.
-
Berry Oat Blend: Mixed berries, soaked oats, milk, and yogurt
Hydrating Summer Coolers
-
Watermelon Cooler: Watermelon, lime juice, and a pinch of salt.
-
Cucumber Mint Juice: Cucumber, apple, water, and mint leaves.
Post-Workout Shakes
-
Peanut Protein Shake: Banana, peanut butter, milk, and cinnamon.
-
Date Almond Shake: Dates (pitted), soaked almonds, milk, and water.
When & Where to Use Your Portable Mini Juicer
Travel, Office, Gym, and Outdoors
-
Travel: Blend healthy drinks on the go.
-
Office: Fresh juice during breaks.
-
Gym: Quick protein shake after workouts.
-
Outdoors: Perfect for picnics, hiking, and park days.
Maintenance & Long-Term Care
Extending Blade and Battery Life
-
Use only crushed ice and soft fruits.
-
Run short blending cycles instead of long ones.
-
Keep charging ports dry.
-
Replace silicone gaskets when worn out.
Conclusion
Using a portable mini juicer is easy once you understand the basics—charge it fully, cut ingredients small, load liquid first, lock the lid, and blend. With regular cleaning and proper care, your juicer will last long and deliver smooth, delicious drinks wherever you go. From quick breakfasts to outdoor adventures, this little device brings fresh juice into your lifestyle—without the hassle of bulky blenders.
FAQ’s
What to put in a portable juicer?
You can put a variety of soft fruits, vegetables, and even leafy greens into a portable juicer. Always wash them, peel when needed, and cut into small bite-sized pieces (around 1 cm each). Avoid hard seeds, thick pits, or overly fibrous items, as these may damage the blades. For a smoother blend, add a small amount of liquid such as water, milk, or juice, but never fill beyond the maximum capacity line.
How to properly use a handheld juicer?
To use a handheld or portable juicer, first charge the device fully. Prepare your fruits by peeling, deseeding, and cutting them into small chunks. Add the pieces into the blending cup along with some liquid if needed. Secure the lid tightly, press the power button, and tilt or gently shake the juicer while blending to ensure smooth results. Once finished, drink directly from the cup or pour into a glass.
Do I need to put water in my juicer?
Not always. Most fruits and vegetables already contain natural water content. However, for a portable blender, adding a little water, milk, or juice helps the blades spin more easily and prevents overloading. The amount depends on your recipe — use extra liquid if you want a smoother, thinner juice or smoothie.
What fruits and vegetables go together in a juicer?
Great combinations include:
-
Apple + Carrot + Ginger (refreshing and energizing)
-
Orange + Pineapple + Mango (tropical boost)
-
Spinach + Cucumber + Green Apple (detox blend)
-
Beetroot + Carrot + Orange (rich in vitamins)
-
Watermelon + Mint (hydrating and light)
Pairing sweet fruits with mild vegetables balances flavor and nutrition.
What are the benefits of a portable juicer?
A portable juicer offers convenience, allowing you to make fresh juice or smoothies anywhere — at home, in the office, at the gym, or outdoors. They are rechargeable, compact, and spill-resistant, making them easy to carry. Most models have enough battery life for multiple blends per charge. They also encourage healthier habits by making fresh drinks available on the go.
Tags:
Previous
Portable Mini Juicer in Pakistan – Fresh Juice Anywhere
Next
How to Wash Portable Juice Blender? Easy Cleaning Guide


